Saturday, March 31, 2012

Taking pictures of flowers

I am going to do a workshop soon with Jane Sassaman.  It is based on designing from nature and we have been told to bring images of flowers.  When I heard that my sister was going to the Melbourne International Flower and Garden show, I thought I had better tag along. The timing seemed to be perfect.
The weather forecast was for sunny and warm, which it was.  Sunscreen slathered on, we took our time wandering around all the displays and stalls.
It is a very big show, taking up the Carlton Gardens and the Royal Exhibition Building.  There were a lot of people there too.


I took photos until my batteries ran down - I really should have listened to myself when I said I hoped they wouldn't run out today!

I wasn't that disappointed as I had taken quite a few photos and was starting to think that maybe I should start thinking about what I wanted to do at the workshop.  I need to choose a colour palette and focus on some of the flower photos I have, not take millions.  But it is so hard, there are so many beautiful shapes and colours.


Not having my camera working also made me look at the show rather than rush around only trying to take photos of flowers.  Isn't it strange how we stop looking when we have a camera, we focus instead on trying to get the best shots.
Fortunately I had my phone and could take the emergency, must have, photos on that.  The ones inside the building are from my phone.
So I obviously didn't just enjoy it, I still had to take photos.  Must try to get over that - but then it would be so much harder to blog.

There were lots of stalls and displays using vegetation as well as art shows, jewellery based on flowers, craft work and other things I ran out of energy to see. Everything had a flower or garden theme of course.


Wednesday, March 28, 2012

Tea Cosy making

Wednesday is the day my friend and I get together to make things and inspire each other in our textile works (and generally have a good time).  Sometimes we go out and get inspiration.  Last week we visited the Buda Historic Home and Garden.
This week we attended a workshop at Bundoora Homestead. We worked in a beautiful old room with a chandelier and a beautiful ceiling.

The aim was to make either a base for a tea cosy or embellishments to add to a base.  We could choose crochet or knitting.
It is years since I have done any crocheting, and I tended to do granny squares and other very flat work.  So, of course, we chose one of the more difficult, textured patterns!

But our teacher was up to the challenge and got us far enough to think that we may understand how the pattern goes together.  It will need more making to get the idea firmly in my mind though. Actually, the two teachers did a good job as most people chose different designs and patterns and there was quite a bit of assistance needed.
As you can see, I didn't get much done and need to practise. 


We made sure that we were using Australian or UK terminology.  I once mistakenly bought a pattern for a scarf that was from the US and, even though I had printed out the comparative stitch descriptions, I kept getting mixed up about what I was supposed to be doing.  I would read DC and do the Australian movement even when I had the US description in front of me.  It was just instinctive to do what I had learnt so long ago.  I gave up in disgust.  Now I may get it out and try again.  I am feeling the need to have some knitting or crochet on the go - it must be autumn.  It will probably mean that I have to write the pattern out - not sure I can be bothered.  I might just find a new pattern.  There are so many around these days and many are free on the internet - but you have to be careful to know what country they originate from, what terminology they use.  Problems, problems.

One lady made a gorgeous pansy that can be added to a base.
Sorry about the focus, I don't seem to have much control with my phone.

The workshop was to support the Tea Cosy Festival that is coming up.  Last year there were all sorts of tea cosies made using a wide range of techniques and materials.  Some were quite practical and some were just amazingly outrageous.  All proceeds go to Cancer Council Victoria. They are hoping to have 500 tea cosies this year.

Friday, March 23, 2012

You HAVE to see this.

The optical illusion site I go to has an amazing post today.  Using threads and beading for installation art.

Thursday, March 22, 2012

Growing Your Own Dyes

I'm not a very serious dyer but a member of the household is a keen gardener. So when she was thinking about what plants to buy to grow I facetiously (did you know this word has all the vowels in order and even includes y??) suggested buying something I could use to dye with.
Saffron was one of the plants on offer from Green Harvest. Apparently it grows well here in Victoria.  The order arrived today and out we went, looking for a good place to plant it.
Don't be holding your breath waiting for me to report on this - it apparently takes a lot of flowers to get enough saffron for dyeing, or cooking.  But it is fun to think of what we can have growing that I might use for dyeing.  And saffron doesn't just give you a colour that is green or brown or a pale yellow. I did once get some lovely yellow fabric using oxalis. I had picked it and frozen it.  I think I read about it in India Flint's book, Eco Colour.

Here is an interesting link about dyeing with saffron.

We have silver beet growing too and when I wash it before cooking, the water turns a pale green.  I must look it up to see if it is good for dyeing - but that seems a waste when it is good for eating.
As I said, I am not that serious about dying my own fabric.

There is another thing that might slow down my dyeing - I do it in the greenhouse.  I moved in there during the drought when it was pointless to be trying to propagate plants.  Now that the drought is over (we hope), there is a growing need for the glasshouse to return to its original purpose.  I think I can retain a corner for my dyeing, I'll have to tidy up and organise my things for the odd occasion when I will be doing some more dyeing.  I only seem to do it when I have a project in mind and there is nothing occurring to me at present.

Sunday, March 18, 2012

Fortuitous Timing

Today I visited Bundoora Homestead to finally see the About Time tapestry exhibition.  It has been touring for quite a while, arranged by Ararat Regional Gallery. I thought I had better get there while I had the chance, I have been meaning to go for ages and was worried that I might miss it. It is on till April 15th but time passes so quickly I thought I should go while the going was good.
As I was driving there I passed signs saying Event Parking.  Oh no, I thought, there must be some event on at the park, I hope it doesn't mean I'll have trouble getting into the Homestead car park.  It turns out that the Event was AT Bundoora Homestead - it was a Garden Tea Party run by Darebin City Council.
There were people all over the place, all out to have a relaxing afternoon in this wonderful autumn weather.

I was allowed to take photos around the house but not of the tapestries.

Darebin Mayor, opening the festivities.

There was the Preston Symphony Orchestra playing, drawing classes, croquet on the lawn, a tour of the tapestries with Jodie J Hill (which seems to be part of the Comedy Festival), an artist sitting with her exhibition, tea cosy making lessons and a display. I probably missed some other things, I really had only gone to see the tapestries.

This is a gorgeous stained glass window that was behind the orchestra.
There is an annual Tea Cosy Festival, run in aid of the Cancer Council of Victoria, in May.  You can make a tea cosy and donate it.  Entries have to be in by April 20th.  There is even a workshop coming up where you can learn how to make one.


These were on display, they belong to a private collection.  They reminded me of the embroidery my mother did, and some I did with her. 


Taking the time to do something properly

I have decided that I have to take the time to try to be a bit more scientific in my approach to printing out my digital images.  I have been trying to get images for deadlines, rather than taking the time to really experiment.

I have another image that I printed out using the TAP paper.  I did it for our ATASDA group.  We were meeting just before the Moomba Festival and the challenge was to produce something for that theme.  As usual, I was wanting an image straight away, I hadn't given myself time to really work on a design.  And I was in the midst of trying to work out the best way to print out some fabric using the home printer.
photo
The design used a photo I took a couple of years ago, some words, some pattern put into one of the words and a little bit of distortion of the reflected word. I enhanced the hue and saturation a bit also.
digital image

The colours have come up much brighter than my swan images, both the TAP one and the treated cotton one. It is actually quite good colour, much more intense than the ones I had produced using the swan images. As I had used a different image, it didn't really tell me how the different image transfer techniques compared.


That's the trouble with trying to compare products, you should only change one thing at a time but I am too impatient and want to use the fabric in a particular way - NOW.

Perhaps I will take the time to do some proper experiments, making sure I use the same base fabric, the same computer settings, the same image, the same hue and saturation settings, etc.  I will have to stop being frugal and say that I am experimenting, not trying to produce fabric for use in a specific quilt or artwork.

And I'll have to make sure I use the proper iron settings - here is an example of what happens when you forget to turn off the steam when using the TAP. 
And here is what happens when you forget that you are using a transfer technique and you should have reversed your text (and the whole image, really).

  Fortunately I had done the above two images rather small so I didn't waste a lot of TAP and fabric.  

Friday, March 16, 2012

Another version of the swans

The online group challenge is to make 12" square art quilts (which will be on show at the Australasian Quilt Convention in April).  I decided to use my swan images again.  I also decided to try another medium for getting my image onto fabric.  I used Transfer Artist Paper (TAP).  It has a slight plastic feel to it (and you have to remember to use the protective paper when ironing it!).  I thought it might give me stronger colours but I am not sure if it has.  I didn't bump up the colours the same as I did with the treated cotton, so I can't really say.

The computer image
 This time it printed out a bit pinker than I had expected.


Making an image to fit 12" square was another challenge and I ended up changing the design a little.

The TAP paper is in US letter, necessitating lots of remembering.  The printer, the printer settings, etc, had to be changed for each print. Once again, I had to print out two images to be overlapped to make the image the correct size.
It is also important to remember to reverse the image before printing as you have to iron it onto your fabric, it is a transfer.  I have only used it on cotton so far but apparently it will adhere to all sorts of surfaces, even non-fabric surfaces.
I thought I had managed it but when I measured the pieced work it was only 10 3/4 inches.  How had that happened???
Anyway, I will have to admit that my printer won't print 12" and work around this.

But I have remembered to put the quilt top together before sewing this time.  I decided to use colour in the border to try to pick up the little bit of colour that is in my pictures.  I think this has been one of my problems with the inkjet printing, the image I have been using is almost black and white, so I am not getting a good idea of what colours print well.

Thursday, March 15, 2012

Swan pics and Photoshop

I have used my swan photos to produce one work which is in the Analogue:Digital exhibition.

It looks great on the computer monitor.  However, I had a bit of trouble printing it out.  I used treated cotton and our inkjet printer.  It came out much lighter than I had expected.  It was also A4, something I had not thought about.  So it was altogether too small. Back to the drawing board (the computer in this case).

I used the Distort - Wave - Square filter to break up a photo of the swans.


Then I cut and pasted some parts of other photos and placed them into some of the dark and boring spots. I copied and pasted parts of the image to put them into new files that would print on A4.  I even remembered to leave an overlap where they would need to be sewn together.


I tried bumping up the intensity of colour through the hue and saturation and it came out a bit green.  I decided not to worry about it, just play around with it.


Because the pieces were sewn together, I decided to just sew along some of the lines in the image when I was quilting it.

Wednesday, March 14, 2012

More digital printing

The work I have in the Analogue:Digital exhibition is another combination of digital photos I took overseas.  I started to work on another 12" square quilt for the online group but got sidetracked by the exhibition.  I used photos I took a few years ago in Scotland.
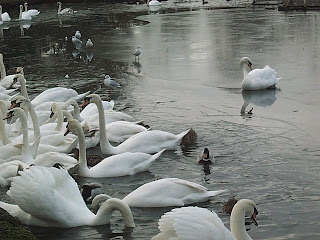
I found is fascinating to see white swans that were swimming around in icy water. It reminded me of my many readings of The Ugly Duckling and how it was affected by the snow and ice - we rarely get frozen water here in Melbourne.
It was amusing to see the swans having to swim in line in the unfrozen water and to see them sitting on the ice. They must have fabulous insulation.


So I had a few photos taken around Stirling Castle.  We also don't have white swans here, so that was part of the fascination too.
Then, last  year, I was lucky enough to be walking around Hyde Park in London when there was a photo shoot to promote the all male Swan Lake ballet.
(I had posted one of these photos before and when I looked for it I found that I had yet another picture of a white swan.)


I decided to play around with those images and see what I came up with. You'll have to wait with bated breath for the next post.

Tuesday, March 13, 2012

Analogue:Digital exhibition

The exhibition opened tonight and runs from tomorrow (the 14th of March) till the 24th of March. I have  a piece in it but found it a hard theme to work to.  It was good to catch up with other students, maybe for the last time.  The exhibition is sponsored by RMIT Arts and Culture and is for current and recently graduated students of the textile and fashion courses.  It is part of the L'Oreal Melbourne Fashion Festival. It was a chance for a few of us to take advantage of the chance to be in an exhibition.
I took a few photos, of the work of people I knew and who gave permission for photos.

Mary-Jane Walker, Butterfly Effect 
View of one of the rooms, mine is the small piece on the wall.

Linda Finger, Tumbleweed

Suellen Entwistle, Boro

As I said, the theme was Analogue:Digital and I found it hard, I don't think I do all that much that is digital.  Many of the works obviously had digital processes involved while others, like mine, used digital and then reverted to analogue techniques.  The melding of analogue and digital technologies was very interesting to see.

Actually, this exhibition is what has inspired me to play around with digital images and my home printer. There will be more posts about my adventures with digital printing. I have already posted a few, here and here.

Using Photoshop and printing onto fabric

I have been playing around with trying to get images onto fabric, using the bubble jet printer and some of my photos.  This has been partly inspired by the AusNZ Art Quilt online group's challenge, which is to make 12" square art quilts designed with a country other than Australia in mind.  The challenge will be on show at the Australian Quilt Convention soon.
I am not sure I am going to get my work done in time but I have been quite inspired to look at some of my photos and think about how I could use them.

I tried using treated cotton and that turned out ok, a bit duller than I had hoped.  I played around with two photos I had, one from France and one playing around with the shutter speed and making the lights blur.


Here is one version.  Unfortunately, I didn't realise that the purple colour was on a separate layer and it didn't print.  As the fabric is not that cheap, and I didn't have much, I decided not to worry.  I just used the one I printed out.
I used the Liquefy tool (under Filter) to play around with the lights.

I spent so much time getting the layers right and trying to intensify the colours that I forgot all I know about quilting and didn't make the quilt top the correct size.  So I have been fiddling around trying to make it 12" square.  Using an A4 printer makes it tricky getting the image large enough. 


Due to my somewhat messy file saving, I can't find the actual image I printed.  But here is a photo of the finished product.   As you can see, the colours are quite muted compared to the photos.  A problem with printing on fabric that has such a different texture to paper - and to the monitor.  Something I will have to adjust to I suppose.

I was looking up how to spell gryphon and found that I wanted to type in griffin.  Strange, I had been writing gryphon but just had to type griffin.  Both seem to be correct. 

Thursday, March 8, 2012

Almost There

I have been working more diligently on my tapestry for the last few days.  I want to get it finished.  Once I get this close I start to get impatient.  I have finished the actual weaving, now I just have to do the hitching off, sewing of slits (yes, I could have done them as I went but I find that I tangle the threads), the tidying of the back, etc.  That will take a few more hours and I am over it for today.
I started the sewing of the slits and am not sure which is worse, doing it as I go or doing it afterwards.
I think it helped a little with the ripple but has not quite got rid of it.  I will see how it looks once I loosen the tension and take it off the loom.  Here's hoping it is not too distorted.
Because I might try to make an animation of the growing tapestry, I have been taking photos as I have worked.  I usually took photos using the automatic setting (I thought that would give me better continuity with colours) but I forgot once or twice.  The difference in settings is quite marked.
automatic setting

automatic with flash

not automatic, probably depth of field setting
 After discussions with a couple of people, I decided that my ripple, clearly seen above, was probably due to a combination of issues.  One is that I may have too much weft in the weaving, from not pulling hard enough when I turn back to finish a pass (I was trying NOT to pull too hard!).  The other thing is that I probably had looser tension in part of the warp.  I tried to overcome this by putting paper under the warp threads.  It did seem to lessen the ripple but didn't eliminate it completely.

One thing I have improved on is the sides, they are fairly straight- very pleasing.

Tuesday, March 6, 2012

Rug illusion

As I have mentioned before, I am interested in optical illusions and I have a site that comes automatically to my home page.  This one was of particular interest. It is of a rug that has been woven to look as if it has a lower level.
Maybe I should put the link on my sidebar.

Saturday, March 3, 2012

March ATASDA meeting

Our meeting was amazing today.  Members of the national committee were down for a working weekend and attended our monthly meeting.  They all had samples of their work to show and tell.  What was especially interesting was the variation in techniques and outcomes.


Each presenter had wonderful work to show us.
We were also encouraged to keep meeting, running workshops, etc.  It took other branches time to get going and we need to be patient, as well as to keep working at it. We also heard about the different challenges each state faces due to various geographic issues.

It was encouraging to see so many local members there today. The next meeting will have a beading workshop as well as the meeting.  It will be on the second Saturday of the month as the first will be Easter.

Mariejka gave a talk about her resin work. She didn't demonstrate as the resin takes so long to set and it is not particularly easy to transport unset.  She was very informative and had some lovely samples to show us. I was too busy taking notes to take any photos.

Some of our local members also had show and tell.  The day was full from go to whoa.  I was getting a bit overwhelmed by the end, with all the wonderful ideas and examples.