Monday, February 28, 2011

Beauty of nature

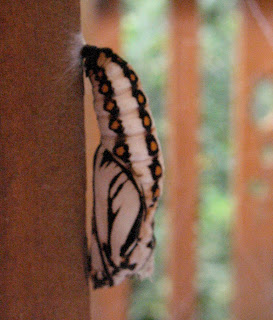
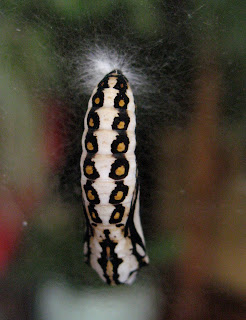
There is to be an exhibition of RMIT students' work soon, Graphica.  I have been working on a piece for it but today I saw some chrysalises that I could have used in my design.  They are beautiful, such geometric designs.
This one insisted on making its chrysalis on the window. It is easy to see all the webbing that holds it on.


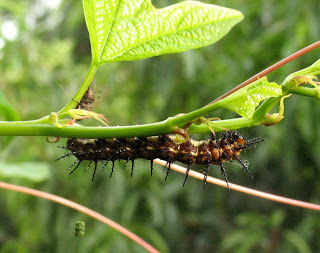
Here is a photo of the caterpillar, a week or so ago.

I don't know what sort of butterfly will emerge, I will have to keep a keen eye on it.

I also took some photos of the spiderweb anchor lines that are left up every day by the spider that builds a new web every night.  At the moment, the anchor lines are across a path that we use, so I was about to break them when I saw how they were attached.  I got so distracted by taking the photos that I forgot to break the strands.

Last week, the strands were attached to the rotary clothes line and I broke them when I turned it but they just reattached themselves to a new part of the clothes line when they drifted on the breeze.  These spiders certainly do work hard.

Saturday, February 19, 2011

Unveiling the community tapestry

The community tapestry for the Dorothy Impey Aged Care Home was unveiled today.  There was a good crowd and much excitement about finally having them in place.
As I have said before, it was a great learning experience, being able to work on this tapestry.  It was woven at the RMIT Brunswick campus and was woven by tapestry students and graduates of the Studio Textiles and Design course, as well as some staff members.
There were 25 students who participated and over 1000 hours of weaving in the project.
They looked good in the site selected and the designers and weavers should be proud.


Exhibition opening

The opening of The Last Word went well on Thursday night.  There was a good crowd, all seeming to be having a lovely time.
The work looked great, a wide variety of styles and subjects that were good talking points.
Thanks to Pauline, who organised the space and to Cresside who organised the hanging of the works, the catalogue, the advertisements, etc.
Harvest Workroom is a great space for it, bright and not too big, not too small.
I remembered to take my camera, so here are a few shots.


Wednesday, February 16, 2011

Getting the exhibition ready

Today we worked on putting The Last Word exhibition on the walls.  I forgot to take my camera!  So just a boring post without any pictures.
It was great to see Cresside working out the best way to display the works, how they went together, the best placement of the works, etc.  A good learning experience.
There were some beautiful works there, all so different from each other.  I had seen quite a few of them in the making but not completed, and not mounted.  There were also some I had not seen before, so it was a great day today.
Watch this space for some photos - we are having the opening tomorrow night.

Thursday, February 10, 2011

Tapestry exhibition - The Last Word

The staff and students from last year's RMIT tapestry course, and some others, are putting on an exhibition of their work.  It is next week at Harvest Workroom, East Brunswick.


I am very pleased that some of my work will be in it.
It will be good to see everyone's work.  We don't usually get to see the finished work of other students.  We work together all semester and then hand in our work without having a chance to see them all mounted.  So this will be a great opportunity to see it all together.

Sunday, February 6, 2011

Trying a new technique

I have played around for the last couple of days with a technique that I saw on a video and also in the last Quilting Arts magazine (Dec/Jan).  It is by Beryl Taylor and incorporates reverse applique.  It looks so simple on the video and sounds so easy in the article.
I have spent three days working on it.  I decided to adapt her work and use my own design, based on tiles I saw in Turkey.  The simplest was of stars as they gave me plenty of pieces to cut out to get the colours showing.  However, I had decided to try to use a blue palette based on the blue and white tiles we saw.  Consequently, the design is not clear - it doesn't 'pop'.

This was despite having 45 different fabrics in the piece - 9 piles with 5 fabrics in each.  I had done the classic quilter thing, finding fabrics that go together beautifully. I needed to use some that I would never put together, to get the contrast.
However, having seen the video, I will put this aside and think about some of the other things Beryl uses on her art quilts, things I would never have thought of doing.  It will be a good experimental piece, if nothing else.

Back to the drawing board.  I then thought about other designs we had seen in Turkey and realised that we had seen somes that had circles as part of them, the same shape that Beryl had used.  So more cutting out and putting together of colours - ones that would have a greater contrast this time.

After I had sewn and then cut them again, I attached the squares to the backing and started playing with the sewing machine.  It is a long time since I have done any free motion sewing so the circles are quite wonky - fortunately that is not only allowable in this design, it is necessary, otherwise you don't get the small sections for cutting into.

I even found some metallic thread in my stash.  I could have sworn I have never sewn with metallic thread but there was a bobbin with some on it.  After many re-threadings, I know why I haven't done a lot of metallic thread sewing.
Tuesday, February 1, 2011

Playing with Optical Illusion quilt ideas

I have been making some samples to see if I can adapt some optical illusions I have seen, at a favourite site of mine, into an art quilt but I keep coming up with something that is too much like a quilt and doesn't have enough 'art quilt' (whatever that is) for me.  I have a fascination for optical illusions and have posted about them before (here and here), with other links.

The idea is to sew a fairly traditional quilt of squares but to make the parallel lines appear to not be parallel.
The problem is that it just looks like my sewing was not all that straight - and it wasn't perfect, I'm not sure it is possible to sew so accurately anyway.  So any little dips in my straight lines seems to detract from the illusion.

This is the starting point, not all the lines are absolutely straight!

This works a bit, especially with the small image.  It has small pieces of fabric stuck onto the grid above.  It is not quilted yet, just sewn together and the pieces glued on.

This is the strips ready to be put into the checkerboard pattern and then pulled slightly out of line.  It is very hard to tell if the lines are actually not straight or if the illusion is working. It is quilted onto a cotton batting.

Even if the illusion worked better, I think I would not be happy as it is not a particularly challenging or interesting design.  It is basic cutting and sewing.  I want to get into art quilting but can't see what I could do to these samples that wouldn't destroy the illusion, so here I stop.


I expect I will abandon this whole optical illusion idea for the time being and see if I can come up with a new technique to experiment with.  It has been good for me in terms of practising accurate cutting and piecing and stitching in the ditch but that is about all at this stage.