Wednesday, April 30, 2014

Making a vessel

Well, the vessel is made. Now to think what on earth I might do with it.
It took a bit of thinking to actually finish it.
I had sewn the paper layers to the thick background. I cut out a shape that I thought would stand up - but didn't actually measure it carefully or find any templates.
I cut out the two pieces, making sure that they were exactly (as much as I could manage) the same shape as each other.

I cut the strips to be the gusset.  The strips weren't big enough to go all the way around so I zigzagged them together, as we had been taught at the Kay Kahn workshop.

I cut some fabric on the bias to be the binding, I even remembered to print on the fabric using the acrylic paints and print block that I had used on the papers.

Then I sewed it to the side pieces and the gusset. I totally forgot that you were supposed to pin the gusset to the sides to measure the actual length you wanted, cut it to the correct size and THEN finish off the binding.
Being the patient person I am, I carefully cut off the ends I had sewn and resewed the bindings on the correct length gusset. No swearing involved at all!!
I remembered that Kim had said to coat the final layer of paper with acrylic wax, which I dutifully did.
It seems to have dulled it all down a bit. Next time, if there is a next time, I will try Golden Gel medium, which she said we could use instead. I painted the acrylic wax on the paper parts, not the fabric.
Today I spent a couple of hours sewing the pieces together and I am very grateful that I didn't put the acrylic wax on the fabric, it was hard enough to sew as it was.
Ta da!!
It stands up but not all that securely, I will have to be careful what I put in it. More research is needed on finding stable vessel designs. 

Tuesday, April 29, 2014

Experimenting with the two workshop processes.

I'm still working on combining my Kay Kahn and Kim Thittichai workshops.
I had a book of furniture fabric samples that I got years ago and I took a couple of pieces out to use in the support layers of Kay Kahn's technique.. I also had some felt from several years ago -no wonder I find it hard to throw things out!! I sewed them together, as we had been shown in the workshop. The size was determined by the sample pieces of fabric which were the same width as the newspaper page - very convenient. They were roughly square, so that is the shape I have ended up with.
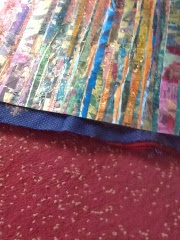
Two layers of commercial felt sandwiched between two layers of furniture fabric. 
                                                    

The paper layer ready to be sewn on.
So I cut my paper 'fabric' to size and sewed it onto the four-layered background.  The paper layers stood up to the sewing, I had wondered  if it would cause perforations that might weaken it but so far so  good.


Sunday, April 27, 2014

More about the workshops at Ballarat 2014

I realised that I haven't given any indication of the other wonderful workshops that were on at Fibre Arts in Ballarat this year.
We had the usual interesting and entertaining talks by the tutors. There was also a wonderful exhibition at the end of the week. I was so engrossed by my own workshop this year that I didn't get to visit many other classrooms to check out what was going on. You do hear from the participants at the meals and morning and afternoon tea breaks but it is not the same as visiting.
However, the exhibition was a good chance to see some of the work that had been done. But you had to be quick, most people took their work down again by the end of the evening.
I am feeling a bit lazy, so you will have to visit the website to check on the various tutors we had this year.  Here are some photos of the final exhibition. I didn't get pictures of all the exhibits, it was rather crowded and there was a lot of socialising.

Starting with our group, of course.
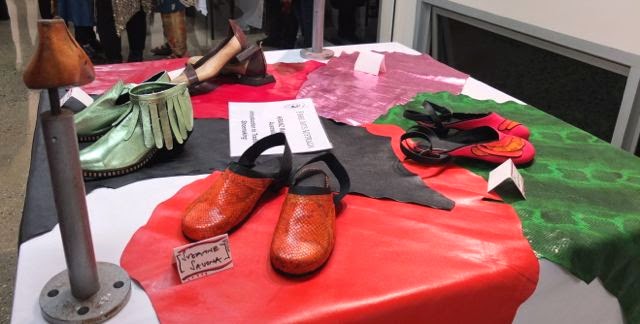
Shoe making.
One of a couple of dyeing groups.
Personal geographies.

Vessels from Kay Kahn's class. 
Woodwork, machine sewing, looked difficult.
One of a couple of clothes making classes, some of the participants were wearing their products - and looked great.

Small sculptures, each with its own story. 
Quirky knitted tea cosies.

Saturday, April 26, 2014

Continuing on from the workshop.

I have been away from home for a few days. I took bits and pieces that we used at the Kim Thittichai workshop so I could play a bit more.
Actually, I only went away for four nights and I took a heap of things to do - way too much. I am having thoughts about melding ideas from Kim's workshop and Kay Kahn's one too.  So, not knowing how it might all develop, and not knowing what I might want to try, I have brought quite a lot of things. 

So far all I have done is play around with the preparation of the papers - the printing and dyeing of the papers, the painting of the Vliesofix, and the playing with sparkly bits. I even found some old Angelina Fibres to sprinkle onto one piece. 
  
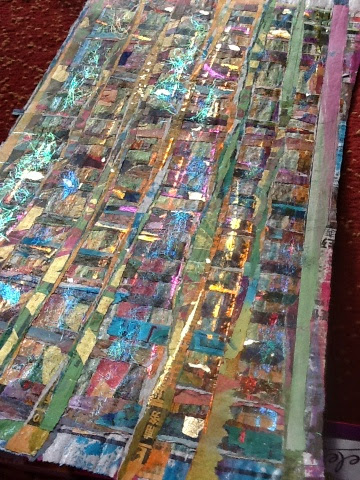
I have made some pieces, about four layers on each. 

Now I have to decide what to do with them, how to use them. 
We didn't have time to put the final layer, acrylic wax or some other varnish type stuff, on any of our pieces at Ballarat, so I will have to see what effect that has. I assume that I should do this last, after I have made my vessel, or whatever I am going to make. 

I did try something else too. I worked on the back of one of my pieces of paper. This was partly due to the usual dilemma of liking what I have done with the printing and dyeing and not really wanting to tear it up. So I had the bright idea of doing both sides, so that the interior of whatever I might make will be looking good too. I will only find out if this was a good idea if I ever get around to finishing off the process. 
The first side, destined to be the interior.

This one has some Angelina Fibres shining brightly.
The reverse side. I also played around with the laying out. I had the vague idea that crossing the laid out strips of paper might strengthen it, make it less likely to tear along the lines of the thicker layers of paper. This is because, it seems to me, that the final layer will be quite thick in some areas but will still have only one layer of paper in places, being the background. Admittedly, it will be strengthened with some Vliesofix.  It may also be bonded onto some interfacing too. More to experiment with! We didn't get around to all you can do, even with such a long workshop. 

Thursday, April 24, 2014

Workshop at Ballarat 2014 - part 4

After preparing the newspaper and other pieces of paper, we painted the Vliesofix (aka Bondaweb) with procion dyes.

The idea was to have at least 5 pieces of paper to tear up.  Yes, to tear up! All that designing and printing and dyeing, only to tear it up.
The idea is to iron some painted Vliesofix onto one of the pieces of paper - this will immediately change the colour of the base paper, depending on how you have dyed the Vliesofix.


Then you tear up one of the pieces of paper and lay it out on the base sheet.  At this stage you can sprinkle glitter, gold flakes, etc. You can also place some heat foil onto the work too.  The shiny bits will attach to the exposed parts of the Vliesofix.
Once you have the pieces ironed on, you tear it up again!
Repeat the process until you have 5 layers - thick enough to sew on.
To seal the work, you can paint it with Golden Gel medium or acrylic wax.  We actually didn't have time to do this final step, we were having too much fun and playing around with ideas and different papers.

Tuesday, April 22, 2014

Workshop at Ballarat 2014 - part 3

Our third design exercise was very simple.  We had another rectangle of black paper that we cut through. We had to look at the spaces between each piece as well as the angles of the cuts. It was surprising how often we tended to make the spaces the same dimensions, not good for the design process.

Once again, we traced the designs into our books for posterity. I didn't make print blocks from this exercise but the opportunity is still there.

Once we had made our print blocks, we painted them with acrylic paint and printed onto cartridge paper, newspaper, pages torn from books, maps, etc.
When the paint was dry, we put procion dyes onto the paper. The acrylic paint resists the dyes so that the printing is clear.


We were encouraged to use foreign language newspapers too, especially if they had non-latin alphabets. 
This was the end of one part of the process. 
I had worried about posting Kim's teaching but it is all there on her blog with our work. So I feel free to continue.

Monday, April 21, 2014

Workshop at Ballarat 2014 - part 2

Continuing the Kim Thittichai workshop report:
The second design exercise we did was simple.
You cut a piece of card (black in this case) to a rectangular shape. Then you cut out pieces and flip them out from the shape, so they will flip back exactly.

I found a few places where I could continue the flipping, not from the rectangle but from the pieces that projected out.

I enjoyed this activity so much that I tried another, using a squarer shape and flipping out from all sides. (Kim called this exercise Flipping Out - very appropriate.)

You have a look at the design, using the L shapes, and choose a part that appeals to you to make a print block. I traced the design onto foam core and onto the funky foam stuff, making sure to colour the negative and positive spaces.  Then you cut the funky foam and attach it to the foam core board.  This is when you realise that it is a VERY GOOD IDEA to mark your positive and negative design  where you are going to stick it - for all the designs you make.  The more complicated the design, the more important it is.
I had actually done something similar with children in Prep and Grade One as part of the maths course.  It is part of the course where you learn flip, slide, turn.

Here is the design I ended up with.
Sorry about the fuzzy picture! 
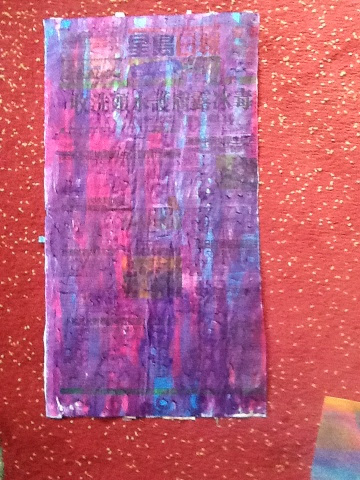
And here it is printed onto newspaper, using one of the printing blocks only.

Saturday, April 19, 2014

Workshop at Ballarat 2014 - part one.

I am finally getting around to posting about the Fibre Arts Forum at Ballarat this year. It was great, as usual. Lots of lovely people doing textile work, designing, making and discussing textile art. No news, newspapers, television, etc. (I will admit to checking the football scores.) It is like a retreat. It would be great even if the workshops weren't - but they are.

I did the Kim Thittichai workshop - it was advertised as a workshop in two parts. The first part was about finding a design to work with. I must admit that I didn't take much notice of what the second part was, I was more interested in learning about designing.
Fortunately, the notes did say that you might only do samples, no finished article to produce at the end. Just what I wanted.

Kim got us to do three design exercises to start with. She kept telling us that they are simple design exercises, not new developments, etc. But it was a chance to spend several days doing it!! No phone calls, no deciding what to cook, no cooking, nothing but the work. Fabulous.

She didn't give us any notes, we just had to do our own work, make our own decisions. Apparently it is all in her book, Experimental Textiles, but I hadn't seen it. Anyway, I am a person who prefers to be shown, and work with others and see what they are doing, rather than read notes or books, not that I don't have my fair share of books.

The first one was to paint a journey. We were to ignore the fact that most of use think we can't draw, we just had to paint images that meant something to us. Then, because we had to fill the paper to at least 80% with black (all the design work was with black and white only), I had to make up some images. They had nothing to do with the journey, they were just images to fill the space. I was even reduced to writing letters of the alphabet to fill in some space - must be the teacher in me, the alphabet is always a good bet.
Here are a few of the journey painting, laid out together.
We then got some L-shaped cards and chose an area that appealed to us. Guess what?  The letter 'e' got into my more intricate design.


We traced the part of the image that interested us the most, transferred it onto some foam core board and some sort of self-adhesive foam stuff. Then we cut the foam and stuck it to the foam core. You can see that we cut the positive and negative images out to make two blocks. We than printed them, using acrylic paint. After the paint dried, we painted the newspaper with procion dye solution.
All this took a bit of time but I loved it.

Tuesday, April 15, 2014

Moon eclipse

I have been away at the Fibre Arts workshop at Ballarat.  It was so busy that I did not have time to do any posts - and I would have had to relearn how to do it with an iPad - AND I didn't have the mental space. I missed such wonderful dates too - 10/4/14 (I had to explain to someone why I liked that one - 10 + 4 = 14, she gave me a funny look) and 14/4/14 (all those lovely 4s).

I came home to hear that we were going to be able to witness a total eclipse of the moon tonight.  At sunset. I was wondering if we were going to see a whole lot of nothing - not quite dark, no moon due to the eclipse. But I wandered down to the corner, which faces east, to see what was what.
I met some new neighbours and we mystified all the drivers going past, you could see them looking at us, looking aside to see what we were looking at - nothing obvious. I was on tenterhooks in case someone ran into the car in front but, thankfully, no accidents occurred.

We were about to give up and go home when, lo and behold, the moon became visible. It emerged from the haze on the horizon, with Mars nearby, and excited us quite a lot.
I took some photos but they are rather blurry as it was quite dark by the time we could see the moon - and it is far away.
As you can see, we had to contend with street lights and traffic but our patience was rewarded and the moon became visible. 


We could see the light gradually growing across the moon, eventually finishing with a full moon. Amazing to watch.
If you look very carefully at this image, taken by another, better camera than mine, you can see the rabbit in the moon, on the darker part. (I have never been able to see the man in the moon but I have often seen the rabbit.)
I hope you can see how the moon started off darkened and gradually moved out of the earth's shadow to become a full moon.
I had to take the camera off automatic and try to remember how to use some of the aperture and shutter speed settings. I did remember eventually but I still had to deal with shaky hand so please forgive the blurry images.

Wednesday, April 9, 2014

Kay Kahn workshop

I was lucky enough to attend a two day workshop with Kay Kahn on the weekend. She is a lovely teacher, patient, generous with her ideas and clear in her instructions. As it was only a two day workshop, she prepared some of it for us beforehand.

We laid out fabrics onto the base, sewed them on securely and decoratively.

Then we cut out the shapes we wanted. Kay didn't give out any notes which meant that she had to repeat her instructions over and over again as we all got to different stages at different times. We also had to design our own vessels. This was a challenge for me as I didn't have any clear idea of what I wanted to achieve. But it didn't matter, Kay could cope with any challenge. I stuck to a very simple design as it was my first attempt at this sort of work.

My small sewing machine, that I purchased for taking to classes, struggled a little with some of the thicker areas. I had only taken cotton threads and they broke - repeatedly!!! But, having learnt a lot more patience since taking up tapestry weaving, I persevered. Because I threaded the machine more times than I have ever done (I am not sure I am not exaggerating!), I didn't quite finish. But all I have to do is sew it together by hand - and we were given a very good demonstration of how to do that too.

Of course, I got the usual questions about fibre art - what is it FOR?  How will I use it? etc. Not to worry, I just ignored those questions.  It is ART.

I am going to the Fibre Arts at Ballarat this week, doing a different class. Kay will be teaching there too. I will be very interested to see what the students can achieve with so much extra time - 4 and half days.

Wednesday, April 2, 2014

Don't Eat Me!

Or is it Thank goodness, my purpose is being served at last! Just before I rotted.


Tuesday, April 1, 2014

Multiple uses for unsuccessful fabrics

I couldn't pass up today's date - 1/4/14, so here's today's musing.
I rearranged some of my 'stuff' lately and came across a bag of silk scarves that I had dyed in the 1980s, if I remember correctly, maybe it was the 90s.  I had a vague memory of not having steamed them and having put them in a dark bag, in a dark corner, waiting till I got around to it. So I did a quick rinse and plenty of colour washed out.
I don't have the steaming equipment (bamboo steamer) I used to have then so I decided to improvise.
As the scarves are fairly long, I got out the unsuccessful screen printing fabric I had, and which I had used to protect some of the plants from the searing sun.
The difference in colour on this piece is from the sun having faded the parts that were on the outside of the plant. It is a marked difference - but it was out in the summer heat for a month or so, so not too surprising I suppose.

 I sprayed the scarves with water to dampen them, wrapped them in the calico, coiled them and sealed them in black plastic bags.
Then I put them in the sun to batch.  And forgot about them - again.

I did all this about a week and a half ago when we thought we were having our last little blast of summer weather. Then the cool autumn weather arrived and I forgot about them.
We are having another bout of hot weather - so late in the year! - and I remembered them today.  It was a good day to rinse them all (the dye stayed in the silk, hooray) and hang them out to dry.


A little bit of dye got onto the calico but that won't stop me from using it for the plants next summer - assuming that we have that horrible, searing heat again, which we keep being assured we will, due to climate change.