Monday, March 14, 2016

Making a small fabric collage.

I have been asked to do a demo of my fabric collage method for the Creative Play group that meets monthly at the Embroiderers Guild. So today I did a trial run.

I have made it quite small as I will either use it for the demo or take it with me to the Ballarat Fibre Arts forum. Even if I don't take it to the group, making it today has allowed me to record the step by step procedure so I can be organised for the day.

Participants at the Fibre Arts workshops are asked to donate a 15cm x 15cm work or, even smaller, a 10cm x 10 cm piece. The money raised is either for a student scholarship to attend the week-long workshop, or for a charity, Mind.

For the demo, which is in May, I am hoping to make another sample, using wadding instead of the interfacing, just to see if there is much difference in the outcome. It will give me the option of offering two slightly different methods that might suit the machine and hand sewers better.

This one is fairly simple and I think it will be possible to do it by hand - there will be hand embroiderers at the play group. I used the machine, heaven forbid that I do hand sewing!

I used a square of adhesive interfacing. I made it about 2cm bigger than needed, to allow for shrinkage that happens with heavy sewing.

As the piece is so small, the pieces of fabric needed to be small also. Yet another reason to never throw out anything, even the tiny offcuts.

I found some pieces of silk that I had dyed previously, using eucalyptus leaves or bark, they were the perfect colour for what I wanted and would give a slightly different texture.
I laid the pieces of fabric out on the interfacing and ironed them on. This is the only ironing the fabric gets - I like wrinkled and textured pieces.

Then I sewed over them to carry the colours across areas, meld edges and generally make it very secure.

At this stage, it looked very boring. So I took some more fabric, a very small amount, and ironed it onto some leftover Vliesofix. Then I cut the small pieces even smaller and added them to the collage - using my original photo as the cartoon.
I used this image for a small tapestry in my first year of the Studio Textiles and Design Course. 

I think I went a bit overboard (pun intended) on the masts.

After I had finished sewing, I cut it to size and put a piece of felt on the back and zigzagged around the edges.

Saturday, March 5, 2016

A different approach

Having made my crocodile partial face too small, I tried again this morning. I must have been tired.
I had enlarged the image and printed it out on silk again. But then I used Vliesofix and put it on the wrong way round - extremely annoying, except I couldn't be bothered being too annoyed.

So I then decided to take a different approach.
I have been playing around with fabric collage for several items lately, some larger and some quite small: the banner quilt and a much smaller piece for my interest group, machine embroidery, at the Victorian Embroiderers' Guild. We have been asked to use an image and interpret it, then leave another image for the next person. I thought an abstract interpretation would be good. It is only about 15cm x 10cm (that's a guess because I can't be bothered going and measuring it. Getting the message about energy levels?).
I only interpreted the rocks. 

So, for the mystery piece, I laid out some background fabric onto some wool batting (it was left over from a project from years ago and was the right size), attached it to the backing and then laid out some small bits of fabric. As it is a small piece, about 20cm x 18cm, they were quite small bits of fabric. As I have said many times, it pays to keep all the scraps.

Then I sewed them down and realised that I would only need a couple of colours for my thread.

I discovered the self-threading ability of my sewing machine. I have had if for nearly a year and haven't used it yet. This is because I had my free lesson and the person teaching me said she hated using it, so I have done my own threading ever since. But I wanted to use a thicker thread today (I had put in a slightly bigger needle) and decided that I wasn't going to be able to do it without help.

Out came the instruction book - lo and behold! it was easy.

Then I decided it needed something extra and I found some knitting wool in my stash (it serves for my tapestry weaving and my sewing, but not for knitting). I couched that down.


Remembering my last disaster, I had allowed room for it to shrink by making it a bit bigger than the finished size. Knowing that it has to fit in with many other pieces, I started to stress about how to make it the correct size. I measured the distance from the lighter patch to the edge and used that as my starting point.

I hope the distances are correct and that it will all line up in the final piece. I suspect it is a wing. Time will tell.

Wednesday, March 2, 2016

Try again

I finished a piece for my interest group at the Embroiderers Guild today. We are working on a mystery photo. We have small sections of the photo to work on and one day it will be revealed to us all.

I have only had this piece lying around for about a year.
It is quite dark and I have not been inspired. Part of the reason is that we are supposed to make each piece an image in itself and I have not been able to see anything in it.

Recently, I asked a nephew if he could see anything in it. He saw the partial top of a crocodile's head - amazing.
I then worked on the image in Photoshop, making it lighter and to the size I wanted.

I printed it out onto some silk that will go through the inkjet printer. I backed it with some adhesive interfacing and I sewed it.

I forgot it would shrink - or I hoped it wouldn't. But it did. So it is too small.
Start again. Soon. Not now.

I am not sure it actually looks like a crocodile's head and it is lighter than the image, so I might play around with it a bit more. Maybe the misfortune will turn out to be fortunate.
But time is running short, I set myself a deadline of taking it to the group meeting on Sunday. I'll have to work on it in the next few days and not worry too much about being perfect, as long as it is the perfect size.

For those of you who can't see - it is lying on a log, floating in water.

Saturday, February 27, 2016

Hmm …

That could have gone better.

I am referring to my attempt to make an A4 sized work of art. The call for entries ended yesterday (Contemporary Art Society), so I won't be sending this piece off.

I thought I would try some Alison Holt style sewing (and silk painting) using one of my many photos of eucalyptus blossom.

I blew my photo up to A4 size, traced the relevant parts, using a water soluble pen, and then put some gutta on the silk. The gutta dissolves the pen, taking away the necessity to worry about blue lines.

I haven't done silk painting for a while and the gutta is one that I have not used before. That's my excuse anyway. The lines are blobby and thicker than I had hoped.

Not to worry, the sewing should cover the white parts, I thought.

But my planning was a bit off, some of the background details needed to be painted without the white lines around them. I have to sew quite heavily to hide the whiteness, so they aren't really background anymore.

I hooped up the silk for my sewing.

I used a large hoop, maybe I should have used a smaller one. Or maybe my technique needs work. Or perhaps I should have used some sort of stabiliser under the silk. (But I find that soluble fabric causes the sewing to shrink when you wash it out - further experimentation needed there.)

The silk has ruched in spots and I can't seem to get rid of the wrinkles, despite stretching the silk over some cardboard and sewing it tightly.
Actually, it looks worse in the photo than reality, and the red is much darker in reality too. 
I have recently completed a 4 week CAE course in frame making, maybe I can do something to improve the piece. At the least, I can practise making a frame - and then hang it up high, above a door or somewhere similar - where the light doesn't shine directly on it and the wrinkles aren't so obvious.

If I were a true scientist, or a perfectionist, I would try the whole process again, changing only the size of the hoop (if that is the problem), and see what result I got. But I doubt that I have the patience to do that. Maybe - I will have to see how the mood strikes me.


Friday, February 26, 2016

Letter box art

Is this a new thing? Letter box art. I haven't seen it before but came across this in a street nearby.


Apparently, the owners are going to change the display soon.

And yes, the Alphington bus stop is still decorated. Some aspects have changed but it is still giving pleasure to passersby (me, at least).

Monday, February 15, 2016

Dew

I took the dog for a walk this morning. It wasn't all that early but neither was it hot. I am loving this summer, cool nights so you can sleep and only a few really hot days.

I noticed an interesting pattern on the ground. It was just sandy soil but there had been dew overnight and it made it look a bit like fungus.


We haven't had much rain recently so the sign of dew was welcome. The main bugbear about summer has been the lack of rain.


Thursday, February 11, 2016

I Can't Resist

As I may have already said, the hollyhocks are gorgeous - and prolific. They keep flowering ...


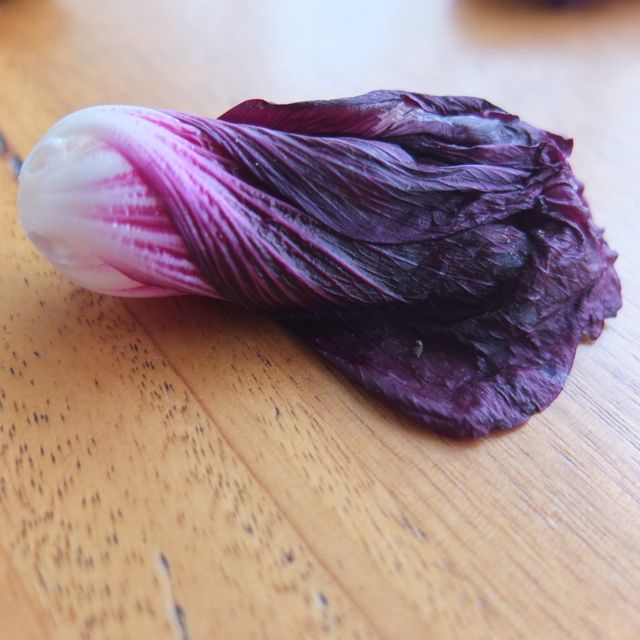
and throwing beautiful spent flowers on the ground where I walk. I just can't let them go to waste!

Consequently, the freezer is getting more and more full of flowers. It's lucky we live near two supermarkets, there isn't all that much room in the freezer for food.

I keep picking the flowers up and photographing the beautiful patterns on them. I have also MANY photos of the flowers.
Can you see the cute little face in the white part? Or is it a monstrous face??


Now I have discovered the pretty little seed pods.


I even found some seeds lying on the ground today. 


I will have to start designing!

The shapes make me think of a workshop I did a few years ago with Jane Sassaman. I will have to go back to my notes and see what I can do with the ideas floating around in my head.

I also have quite a bit of fabric, dyed using the hollyhocks. They aren't all the correct colour for representing the flowers but that doesn't matter, one of the good things about Jane's class was the stylising of the images. I can use whatever colours I want, it doesn't actually have to look like hollyhocks, they are just my starting point.

If I ever get around to doing more than looking and thinking.

You can find a downloadable PDF, and video, at Quilting Arts, about this design process.